Slice-of-life example for encouraging interest in Rust: Leathercrafting
The job of a full-time programmer is intensive in terms of mental energy, and there isn’t always much left over for coding pursuits after the working hours - or if there is, it does happen that one might want to pursue something else than sitting at their home desk. However, sometimes these other pursuits lead to interesting insights.
For this year’s (probably only) post, I’d like to offer a few reasons to try out Rust, in form of a slice of life related to leathercrafting. And Ferris.
How it started
Vacuum molding
As a hobbyist leathercrafter, I do enjoy experimenting with various techniques. One technique I found particular favour in, is using vacuum bags for making molds to leather items.
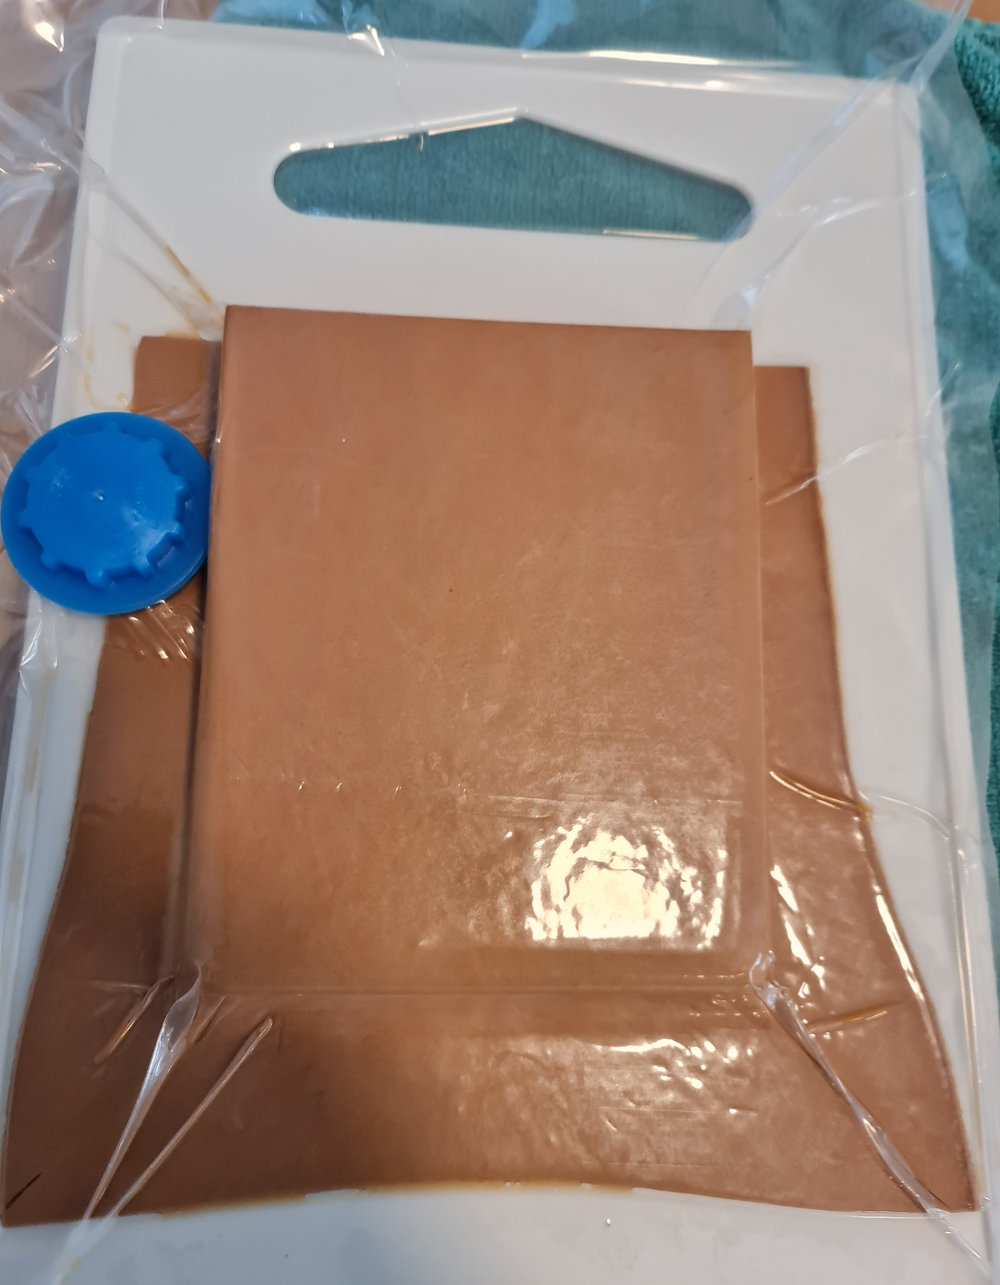
A very useful technique for a home workshop - tools are easy to acquire, and results so far have been proven. However, it isn’t the point of the story.
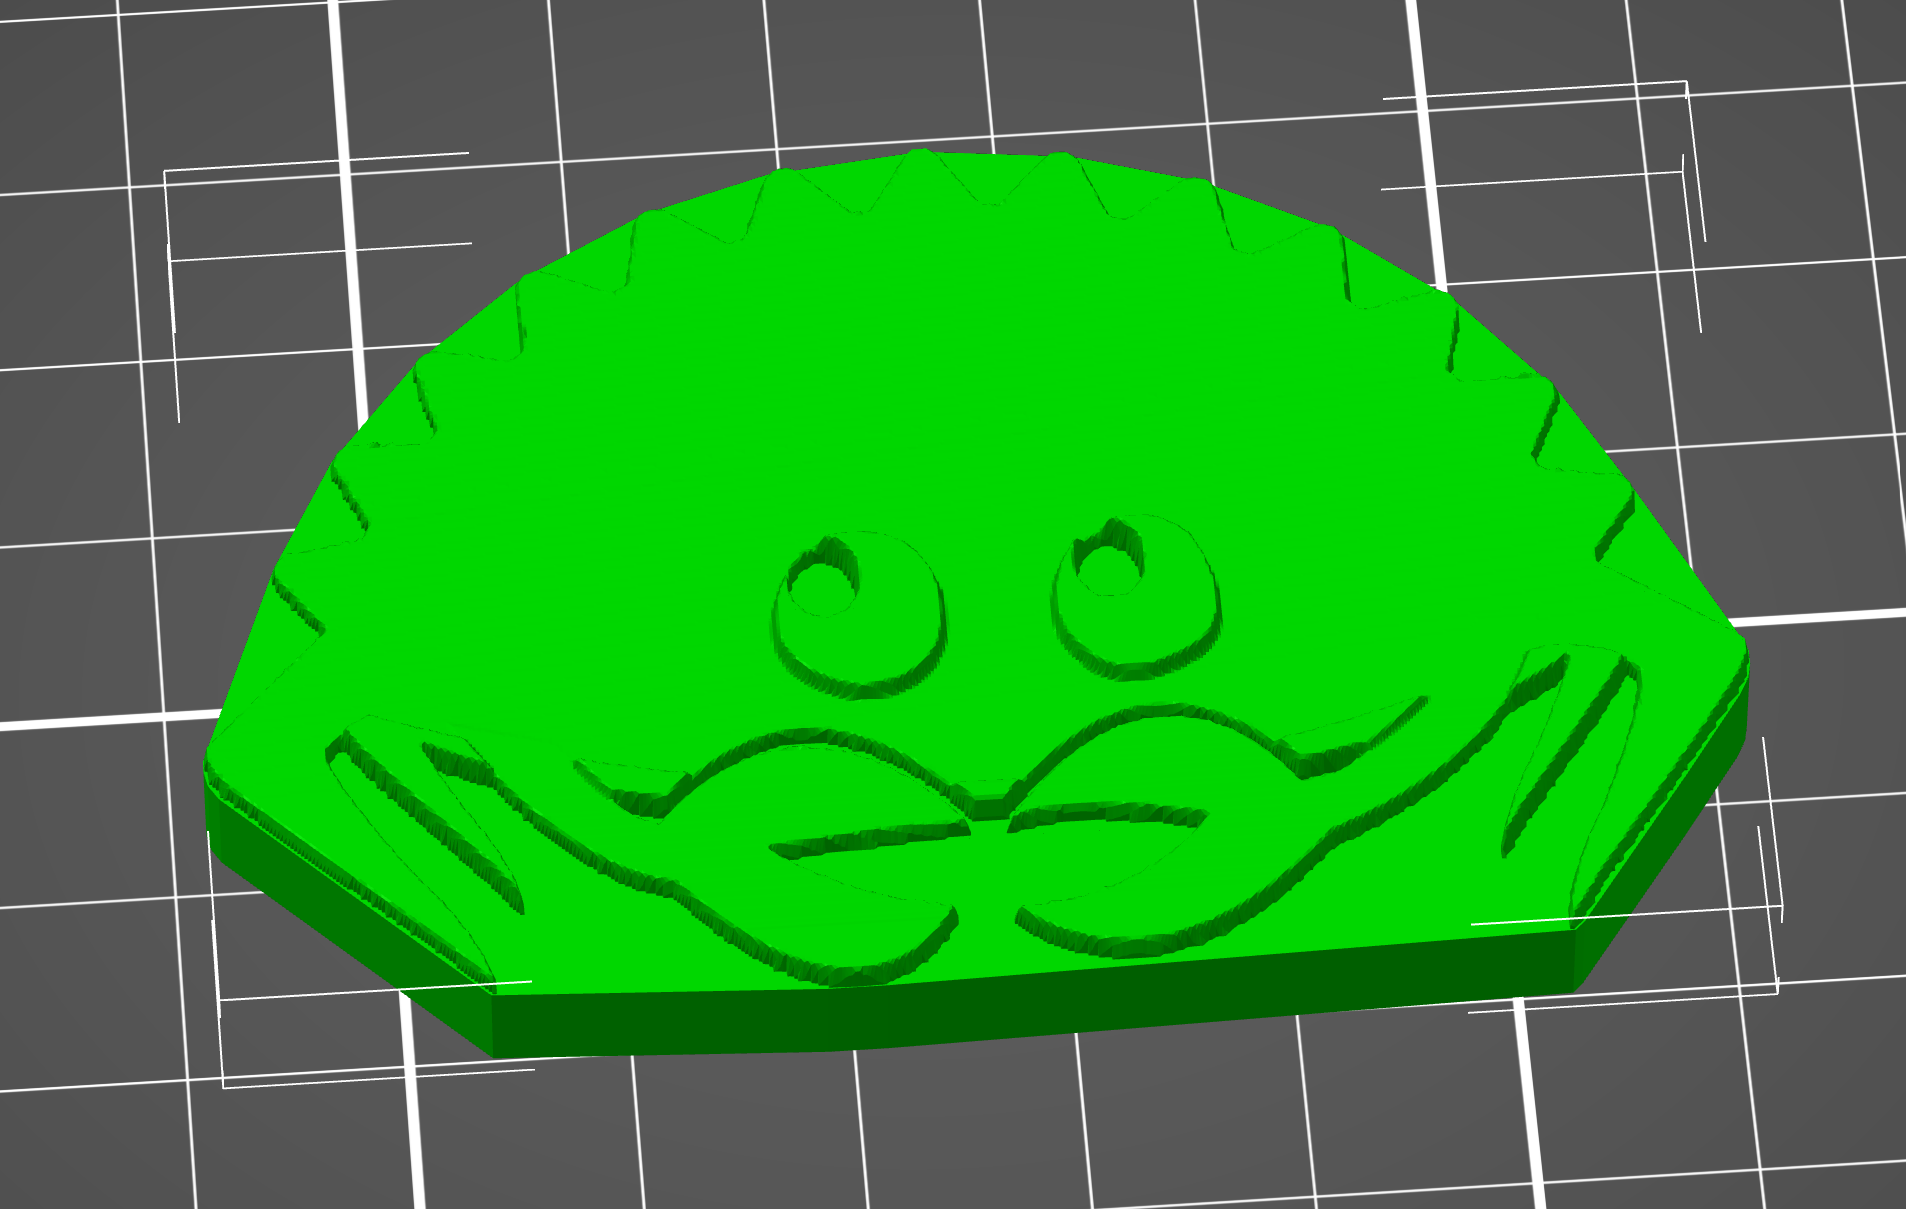
Stamping
A decorative case, as being worked on in the picture above, needs decoration. And, a part of veg-tan leathercrafting is stamping, or more generically impressing patterns on your items for decorative purposes. There are many examples online of works with absolutely wonderous creations - but as my artistic talents have always been closer to engineer drawings, I so far haven’t tried out that path. Instead, some further research revealed that 3D printing is a very viable approach, as evidenced by many sources.
At first, true to my habits. I tried working with plain OpenSCAD. However, the results weren’t too spectacular - lots of manual adjustments were needed to create a somewhat acceptable shape. In addition, OpenSCAD primitives necessarily conscribe you to very sharp, pixel-based output. I wanted something with a slightly more complex profile.
Enter Rust, with insights
So, I resolved to make a tool with a single purpose: given a pixel image and some scale information, emit an OpenSCAD file. I shall now point out a few things I found during my weekend excursion. They are in no particular order, and highlight how I felt.
Libraries and built-in primitives
Rust might not still have the vast collection of libraries as more major languages - but for many cases, there does exist very robust and useful tooling. Take Clap for instance - defining parameter parsing to my tool was about as easy as follows.
1
2
3
4
5
6
7
8
9
10
11
12
13
14
15
16
17
18
19
20
21
22
23
24
25
26
27
28
29
30
31
32
33
34
35
36
37
38
39
40
41
42
43
44
45
#[derive(Debug, Parser)]
#[command(author, version, about, long_about = None)]
pub struct CliArgs {
    /// Filename to output to; if not specified, a default name and type will be chosen
    #[arg(short = 'o', long)]
    pub output: Option<String>,
    /// By default, print checks will cause the generation to stop; if you know what you are doing, this behavior can be disabled to allow generating models normally not possible
    #[arg(short = 'i', long = "print-checks-as-warnings")]
    pub print_checks_as_warnings: bool,
    /// Desired width of the final stamp, given as a dimension. Cannot be given at the same time as height or per-side length
    #[arg(long = "width", value_parser = parse_dimension_arg)]
    pub width: Option<Decimal>,
    /// Desired height of the final stamp, given as a dimension. Cannot be given at the same time as width or per-side length
    #[arg(long = "height", value_parser = parse_dimension_arg)]
    pub height: Option<Decimal>,
    /// Length of side for one pixel in the final print. Cannot be given at the same time as width or length
    #[arg(long = "pixel-length", value_parser = parse_dimension_arg)]
    pub pixel_length: Option<Decimal>,
    /// How thick the base should be. Depending on the material used and the size of the stamp, this may need to be adjusted from the default
    #[arg(long = "base-thickness", value_parser = parse_dimension_arg, default_value = "4mm")]
    pub base_thickness: Decimal,
    /// How deep the details are printed
    #[arg(long = "depth", value_parser = parse_dimension_arg, default_value = "2mm")]
    pub depth: Decimal,
    /// Factor for the dimensions of the tip, as compared to dimensions of a single pixel. This has the consequence of creating some tapering starting from the base. By default, a small amount of tapering is created
    #[arg(long = "tip-sharpness-factor", value_parser = parse_nonzero_decimal_factor, default_value = "0.75")]
    pub tip_sharpness_factor: Decimal,
    /// File name for input image
    #[arg(value_parser = parse_image_input_from_file)]
    pub input_file: (DynamicImage, String)
}

fn parse_dimension_arg(input: &str) -> Result<Decimal, String> {
    dimension_string_to_decimal_mm(input).map_err(|err| err.to_string())
}

fn parse_nonzero_decimal_factor(input: &str) -> Result<Decimal, String> {
    let dec = Decimal::from_str_exact(input).map_err(|err| err.to_string())?;

    if dec.le(&Decimal::ZERO) || dec.gt(&Decimal::ONE) {
        return Err("factor must be greater than zero and by maximum one".to_owned())
    }

    Ok(dec)
}
(I know, I know, String-typed errors are a bad practice - I’ll do better next time with enums + implicit From conversion).
Decimal refers to rust_decimal, a library for calculations using decimal semantics, as opposed to common floating-point semantics.
Also, a shout-out to this singular line, making short work of embedding some OpenSCAD glue code:
1
static EMBEDDED_LIBRARY: &'static [u8] = include_bytes!("embedded_library.scad");
Tooling
Installing both abovementioned dependencies was every bit as easy as adding this to the Cargo dependency file
1
2
3
clap = { version = "4.3.4", features = ["derive"] }
rust_decimal = "1.30.0"
rust_decimal_macros = "1.30.0"
In general, despite some rough edges, Cargo as a build tool has been a very pleasant experience - even more so than with some other major languages I deal with.
Correctness over development speed
I acknowledge Rust is slow to write. The language demands a lot from you as a programmer - if you simply want to script something quick, it isn’t the choice for you.
However, on the flipside - I found that a big amount of errors I encountered were either caught at compile-time, or were a result of not quite thinking through the problem domain. The language itself, I didn’t find to have major footguns - unlike, for example, Java, which keeps tripping me up with null errors still to this day. And I stood out of way of unsafe code, which generally is a sign of a potential footgun in itself.
Conclusion
After lots of experimenting, and a multi-hour print.. it worked. I got the stamp I wanted, and it was perfectly usable. Concept has been proven to be viable, and once time again permits, I might continue this journey again - there are improvements and optimizations to be made. I will need a better press first though, as applying large stamps with hammering isn’t.. very even.
P.S. Use --enable=manifold with OpenSCAD, if you repeat this experiment. You’ll thank me.